

User Manual
THE DEN 4 PIECE WATCH WINDER SAFE
THE DEN OWNER'S MANUAL
Congratulations on your purchase of The Den 4 Piece Watch Winder Safe. In this manual you will find instructions on how to open your safe for the first time, setting up the fingerprint lock or keycode, using your safe and the pre-programmed watch winders inside.

Step 1: OPEN THE BOX
Inside the accessory box (located outside the safe) you will find keys and an external battery compartment to initially open your safe. You will also find a set of screws if you would like to mount the safe to a wall or cabinet.
Step 2: BATTERIES
The Den requires 8 x AA batteries in total (not included). 4 x AA batteries to be used in the external battery compartment, for the biometric keypad. And 4 x AA batteries are required for the internal battery compartment.
Step 3: OPENING THE DEN
Opening the Den for the first time can be done in one of two ways:
1. Use the key provided.
Unscrew the silver cap to the left of the keypad. Insert the key and unlock the safe.

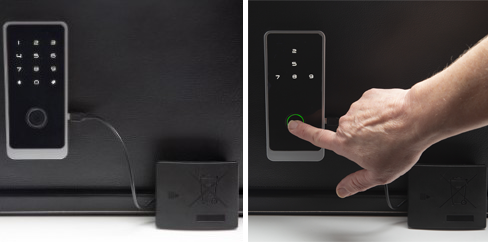
2. Use the external battery pack.
Slide the lid across to release and open the battery compartment, add 4 x AA batteries. Plug the USB connector into the right side of the biometric keypad.
Please ensure the keys and external battery pack are securely stored in a separate location from The Den, where they can be easily accessed if needed in the future.
Now you are ready to set your keypad code and/or fingerprint.
Step 4: REGISTER YOUR FINGERPRINT
1. Password or Fingerprint
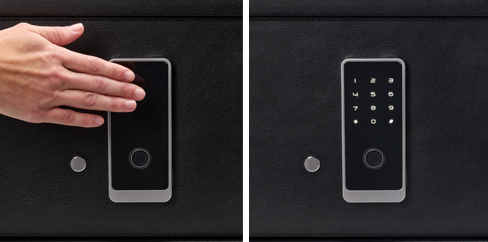
1. With the door open, press the button on the left-hand inside panel of the door’s cover (near the door hinge).
2. You will hear one “beep” and the blue light will turn ON the keypad.
3. Place and leave your finger on the sensor until you hear one “beep”, then take your finger off the sensor. Repeat this step six times.
4. If the fingerprint registration is successful, the fingerprint light will turn green. If the fingerprint registration fails, the fingerprint light will turn red and you will need to start the fingerprint registration process again.
PLEASE NOTE:
1. After fingerprint registration, please DO NOT close the door. Keep the door open and test the fingerprint registration is operational.
2. Please make sure your finger is clean and dry before starting your fingerprint registration.
3. During fingerprint registration, move your chosen finger in different angles on the sensor (front, left side, right side, etc.) to improve the sensor recognition.
4. During the process, you need to input the SAME finger 2 times. Please do it with patience.
5. If you exceed 100 fingerprint registrations, the RED light turns on and returns to the standby state. In order to register a new fingerprint you would need to empty the fingerprint library (see step 6).
Step 5: LOCK THE DOOR
Fingerprint Lock: Place your registered fingerprint (see Step 4) on the fingerprint sensor, if successful, the motor will rotate, and the lock bolts will protrude and lock the safe.
Press the “#" key to lock the door: Touch the key area, the key back-light will turn on, then press the “#" key, if successful, the motor rotates, the lock bolts will protrude and lock the safe.
Step 6: DELETE FINGERPRINT REGISTRATIONS AND RESET THE DEN
Make sure the door is open and locks bolts are retracted inside the door, press and hold the button on the left-hand inside panel of the door’s cover (near the door hinge) for approximately 4 seconds. You will hear two “beeps”, ALL fingerprint registrations and key pad codes will be deleted, The Den will be restored to factory default settings. The default password is 123456# (For security, you are advised to delete all fingerprints before use, change keypad code and register your own fingerprint and keypad code). Go back to STEP 4 to register your fingerprint.
ADDITIONAL INFORMATION
Step 7: PASSWORD CHANGE
1. Touch the keypad zone to activate the Touch Keypad, press and hold the "*" key for two seconds, when you hear a single “beep”, you can change the keypad code.
2. Input the default password 123456# or your old Password, if the code is correct, you will hear two “beeps”, if it fails, you will hear three “beeps”.
3. Input your new keypad code, (6-12 digits), press "#”. When you hear two “beeps”, input your new code again, and press "#" to confirm. If the code is the same, when you hear two “beeps”, your keypad code has been changed. If the password is not correct, you will hear three “beeps”.
You can now exit the change keypad code status.
Step 8: CHANGE MANAGEMENT CODE
1. Touch the keypad zone to activate the keypad. Press and hold the "*" key for two seconds, when you hear a single “beep”, then enter the password modification state.
2. Input the default management code 888888#, if the code is correct, you will hear two “beeps”, if it is incorrect you will hear three “beeps”, and The Den will quit the change management code status.
3. Input the new code, (6-12 digits) , press the “#", when you hear two “beeps”, input the new code again, press “#“ to confirm.
If the code is the same, when you hear two “beeps”, your management code change is complete. If the code is not correct, you will hear three “beeps”.
Exit the change password status.

Step 9: CHANGE THE OPEN MODE
There are three open modes:
Mode 1: Keypad code or fingerprint
Mode 2: Keypad code and fingerprint
How to modify the open mode operation:
1. Touch the keypad zone to activate the keypad, press the "*" key for two seconds, then you will hear one “beep”. Press the "1" key, and then press the "#“ key to confirm.
2. If Mode 1: keypad code or fingerprint code, and you want to change to Mode 2: keypad code + fingerprint, enter the correct password, press the "#” key to confirm. You will hear two “beeps,” then the modification has been successful.
3. If Mode 2: keypad code + fingerprint, and you want to change to Mode 1: keypad code or fingerprint, enter the correct keypad code, press the "#” key to confirm, continue to enter the fingerprint. If the fingerprint is correct, you will hear two “beeps,” then the modification has been successful.
IMPORTANT
1. If you hear three "beeps" after unlocking The Den, it indicates low battery. Please promptly replace the batteries to prevent potential unlocking failures caused by insufficient battery power.
2. To activate the vibration alarm, press the “ # ” key after locking. Once activated, the alarm will sound for one minute. To deactivate the alarm, enter the correct keypad code or use the fingerprint sensor.
3. If an incorrect keypad code is entered three consecutive times or an incorrect fingerprint is scanned five times in a row, it will activate the alarm for one minute.
The alarm can be deactivated by entering the correct password or scanning the correct fingerprint during the alarm period.
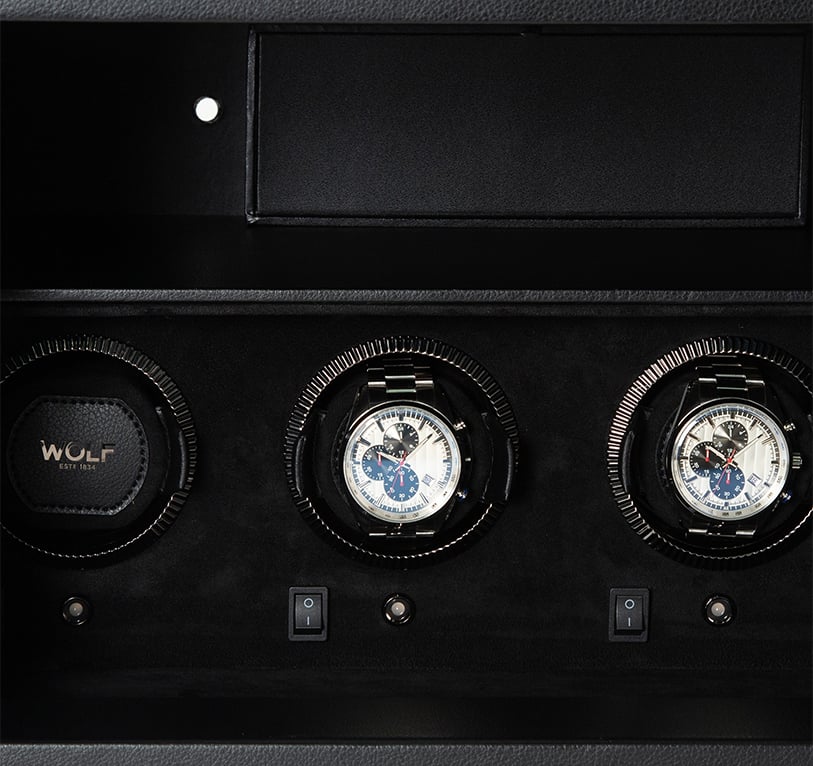
PRE-PROGRAMED WATCH WINDER
GETTING STARTED
All WOLF watch winders feature Turns Per Day, our patented technology. Before you plug in your winder, follow the steps below:
FOLLOW THE STEPS
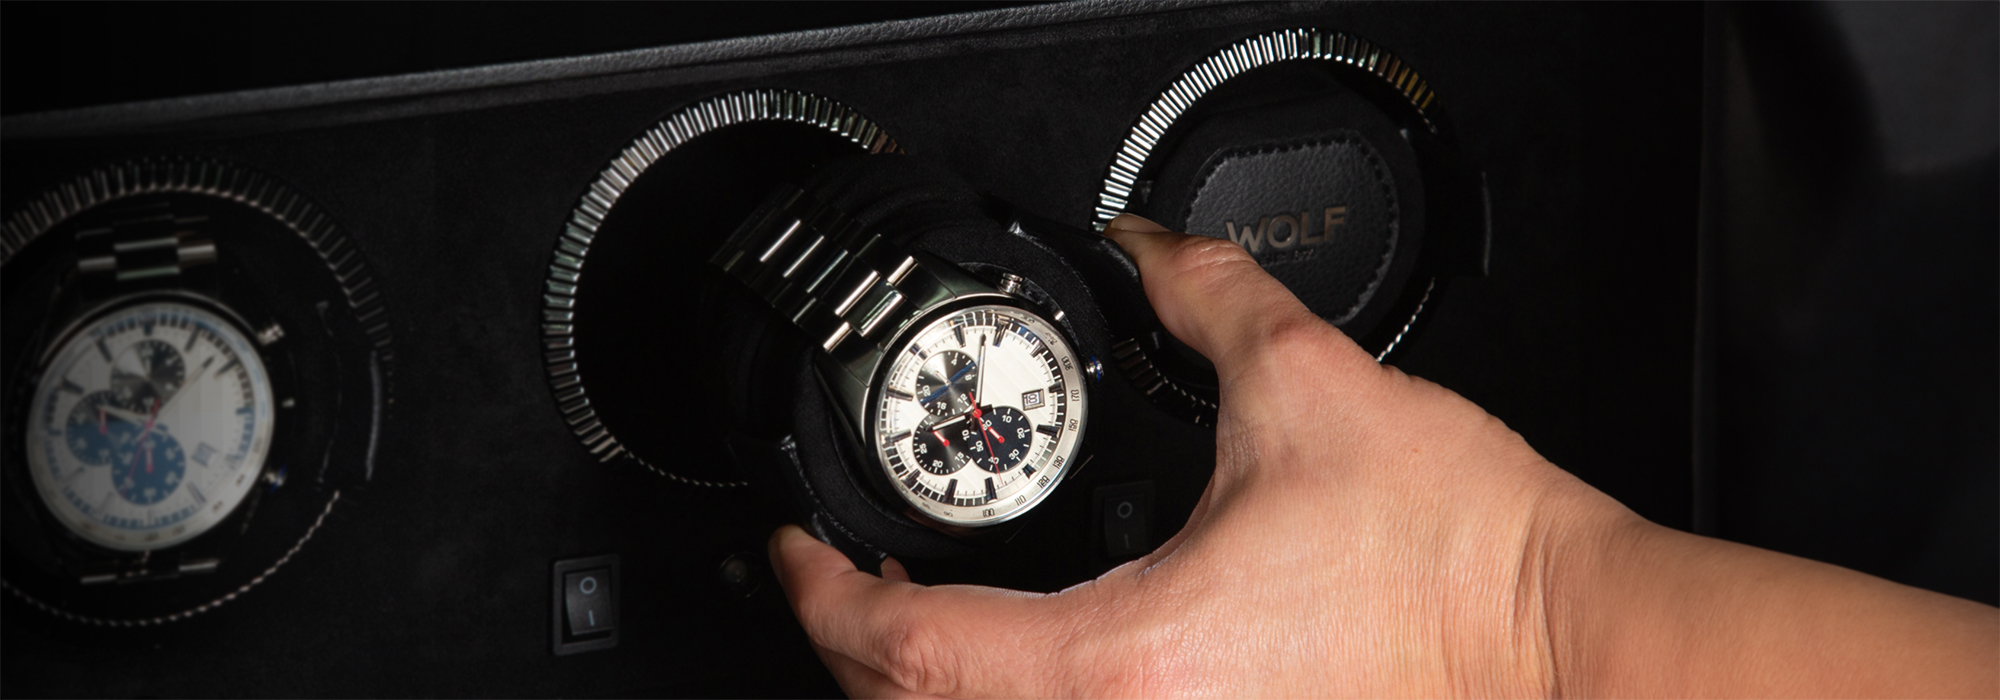
STEP 1
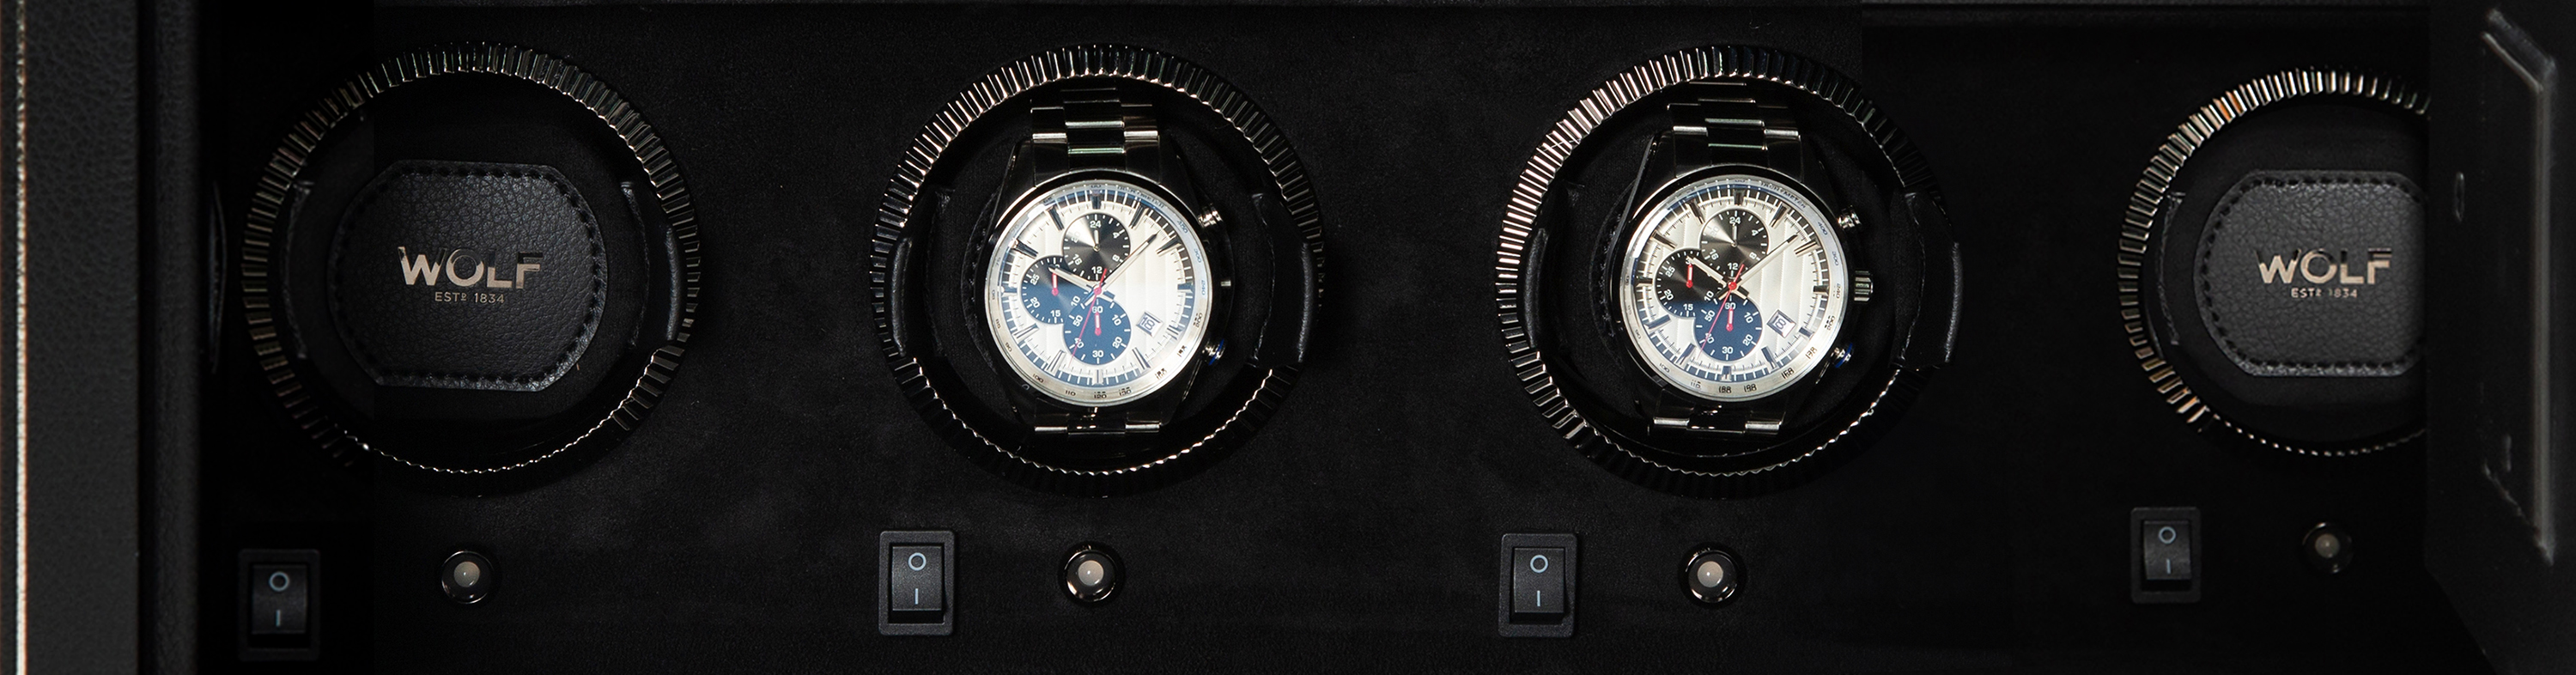
Remove the cuff from the winder drum by pulling firmly on the two tabs. Secure the strap or bracelet of your watch. Compress the cuff and slide your watch securely over the cuff, with your watch dial facing outwards. Push the cuff into the drum until it locks into place, an audible click will be heard.
STEP 2
To start the rotation programme, turn the power switch to "ON" position. Please note that the LED light will keep blinking during the rest and pause periods of the rotation programme. This shows that the programme is in operational mode. To stop the rotation programme turn the switch to "OFF".
ADDITIONAL INFORMATION
Part 1: POWER SOURCES
The Den 4 piece watch winder safe comes with a power adapter, model number (TY0500100), (AC/DC 5.0-volt output) and will also run on 16 x AA batteries (not included). The winder will automatically switch to mains power if both power sources are connected.
Part 2: RETURN TO START
You can set your watch to start in any position and it will return to the same position when the cycle is complete.
The first time you turn your watch winder on you will notice that the drum rotates and then rests. The drum will always stop at this position, during and at the end of all cycles.
That means that if you place your watch inside the drum with 12 o'clock, at the
top, during all test cycles, your watch will come to a rest at the 12 o'clock position.
You can choose any position you like.
IMPORTANT
Note that this winder will not wind your watch continuously. The computer chip inside has been programmed to wind your watch on an intermittent basis only, with extended “pause” and “sleep” phases. This is for the protection of the mainspring of your watch.
• The Den battery compartment is located in safe above the winders.
Open the cover to change, insert or remove the batteries.
• Non-rechargeable batteries are not to be recharged.
• Rechargeable batteries have not yet been charged.
• Different types of batteries or new and used batteries are not to be mixed.
• Batteries are to be inserted with the correct polarity.
• Exhausted batteries are to be removed from the appliance and safely disposed of.
• If the appliance is to be stored unused for a long period, the batteries should
be removed.
• The supply terminals are not to be short-circuit.
IMPORTANT
The Den is suitable for children aged 8 years and older, as well as individuals with physical, sensory, or mental limitations, or those lacking experience and knowledge, provided they receive supervision or instructions on safe usage and understand the associated risks.
Children should refrain from playing with the Den. Cleaning and user maintenance must not be carried out by children without supervision.
The Den should only be operated with the power supply unit provided.
All WOLF watch winders are made under one or more US and Foreign Patent Nos. For the actual Patent No. for your purchased winder, please see Patent No. marking on the winder.
WOLF 1834 - All rights reserved.
All products are proprietary and/ or patented by WOLF 1834. Rights will be legally enforced.
DEN0424